Welcome back. Let’s get to it. This is lesson II on Carving Wood robots. You may want to review lesson I from my previous article, however, if you are holding your finished wood blank then you are ready to continue. First keep in mind that this is a primary wood blank You can still remove more wood with your coping saw before reaching for your carving knife. Let me explain. Your wood robot’s head should end up smaller than the body. So with your coping saw remove 14/16 inch from the left and the same amount of wood from the right. Then remove 5/16 inch from the front of the head and remove 5/16 from the back of the robot’s head. Your blank should now have a head sitting on top of a bulky body.
Next work on the arms. With the coping saw remove 7/16 inch from the front of the right arm and remove the same from the back of the same arm. Do this same procedure on the robot’s left arm. Remember to use the same measurements. Looking at your figure you should see a resemblance of two robot arms on each side, and you haven’t used a carving knife yet. Your figure’s arms should look almost square from the top but actually they might measure approximately 9/16 by 10/16 inch. Don’t worry about exact measurements at this time. You can eyeball this whole project and use approximate judgement. Now you have a wood robot type shape where you can distinguish a head, two arms and one leg upon which the carved wood robot stands proudly on.
So far you have only used the coping saw and have only cut straight lines with it. Did you know that a coping saw can cut angles, curves and bends? With this little miniature saw you can perform many different cuts and even give the electric scroll saw some competition. At this point in your project, carving wood robots, you can plainly see that your figure has a front and a back that look identical. Well, you decide which side will be the front and of course the back will be the opposite side. Keep in mind that the two arms are on the sides. Now that you have decided which side is the front of the wood robot, the next step will be in sawing off a portion of the front legs, but first decide how big the robot’s feet will be in terms of height. I usually make the feet at ½ inch in height. To do this measure ½ inch from the robots bottom up along his leg where the feet would be. Draw a line from the front of the future feet toward the back a ½ inch. From that point measure 2 and 3/16 inches from the top of the future feet to the bottom of the robot’s body. In reality you will be cutting or removing a long rectangular piece of wood that should measure approximately ½ inch by 2 and 3/16 inches from the front of the robot’s legs. An important note: when cutting or sawing toward both arms do not accidently cut the lower parts of both arms which happen to be the future hands! I am referring to when you get ready to cut underneath the body.
After you finish what is described in the last paragraph cut a similar piece from the back of the legs but not as wide, make it 2 and 3/16 inches long but only 3/16 of an inch wide. Again do not cut into the portion of the robot that will eventually become the hands of the carved wood robot. By this time your wood robot should begin looking like a wood robot but with no details. This is what I will refer to as the secondary wood blank. Study your figure and imagine what you plan to do next. Visualize where the eyes will go if you decide to place eyes on its head. Turn your wood robot around and view it from all angles and configure what you will add or take away from his arms or legs. Ask yourself, "Will my robot’s body be square in nature or rectangular or will I decide on making a cylinder body?" There are many variations one can take from this point.
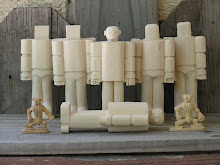
Let us review. You are sitting there looking at what most woodcarvers call a blank. Your robot’s shape is outlined and literally ready to be carved. Be proud. You have accomplished quite a lot! So far you have used the coping saw and removed unnecessary pieces of wood. Basically, you have experienced using this fine little instrument and witnessed its potential. I was told once by a great contemporary carver that he thought that the great sculptors such as Michelangelo had to have used saws in their work. Without saws the projects would have taken too long and certainly made the job a lot harder to accomplish. My sincere thanks for reading this article, and until next time, keep on carving wood robots.
Wednesday, May 20, 2009
Subscribe to:
Post Comments (Atom)
No comments:
Post a Comment